Install the GDK development environment
If you want to contribute to the GitLab codebase and want a development environment in which to test your changes, you can use the GitLab Development Kit (GDK), a local version of GitLab that's yours to play with.
The GDK is a local development environment that includes an installation of self-managed GitLab, sample projects, and administrator access with which you can test functionality.
If you prefer to use GDK in a local virtual machine, use the steps in Configure GDK-in-a-box
View an interactive demo of this step.
Install and configure GitLab Development Kit (GDK)
If you already have a working GDK, update it to use the community fork.
Set aside about two hours to install the GDK. If all goes smoothly, it should take about an hour to install.
Sometimes the installation needs some tweaks to make it work, so you should also set aside some time for troubleshooting. It might seem like a lot of work, but after you have the GDK running, you'll be able to make any changes.
To install the GDK:
-
Ensure you're on one of the supported platforms.
-
Confirm that Git is installed, and that you have a source code editor.
-
Choose the directory where you want to install the GDK. The installation script installs the application to a new subdirectory called
gitlab-development-kit.Keep the directory name short. Some users encounter issues with long directory names.
-
From the command line, go to that directory. In this example, create and change to the
devdirectory:mkdir ~/dev && cd "$_" -
Run the one-line installation command:
curl "https://gitlab.com/gitlab-org/gitlab-development-kit/-/raw/main/support/install" | bashThis script clones the GitLab Development Kit (GDK) repository into a new subdirectory, and sets up necessary dependencies using the
asdfversion manager (including Ruby, Node.js, PostgreSQL, Redis, and more).NOTE: If you're using another version manager for those dependencies, refer to the troubleshooting section to avoid conflicts.
-
For the message
Where would you like to install the GDK? [./gitlab-development-kit], press Enter to accept the default location. -
For the message
Which GitLab repo URL would you like to clone?, enter the GitLab community fork URL:https://gitlab.com/gitlab-community/gitlab.git -
For the message
GitLab would like to collect basic error and usage data, choose your option based on the prompt.While the installation is running, copy any messages that are displayed. If you have any problems with the installation, you can use this output as part of troubleshooting.
-
After the installation is complete, copy the
sourcecommand from the message corresponding to your shell from the messageINFO: To make sure GDK commands are available in this shell:source ~/.asdf/asdf.sh -
Go to the directory where the GDK was installed:
cd gitlab-development-kit -
Run
gdk truncate-legacy-tablesto ensure that the data in the main and CI databases are truncated, thengdk doctorto confirm the GDK installation:gdk truncate-legacy-tables && gdk doctor- If
gdk doctorreturns errors, consult the Troubleshoot GDK section. - If
gdk doctorreturnsYour GDK is healthy, proceed to the next step.
- If
-
Start the GDK:
gdk start -
Wait for
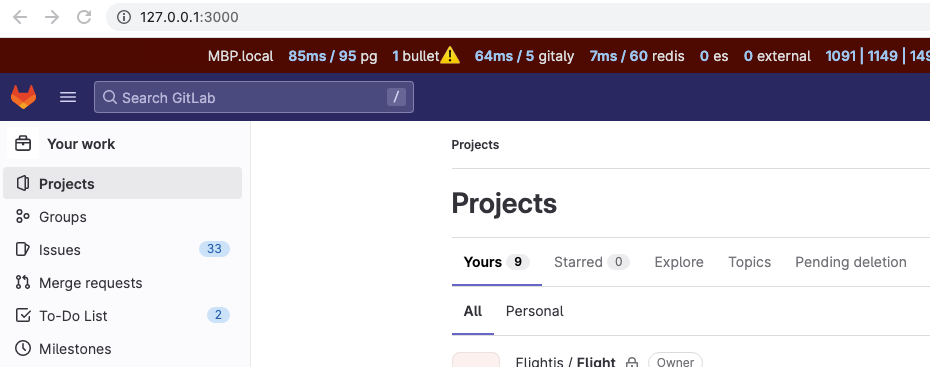
GitLab available at http://127.0.0.1:3000, and connect to the GDK using the URL provided. -
Sign in with the username
rootand the password5iveL!fe. You will be prompted to reset your password the first time you sign in. -
Continue to Change the code with the GDK.
Update an existing GDK installation
If you have an existing GDK installation, you should update it to use the community fork.
-
Delete the existing
gitlab-development-kit/gitlabdirectory. -
Clone the community fork into that location:
cd gitlab-development-kit
git clone https://gitlab.com/gitlab-community/gitlab.git
To confirm it was successful:
- Ensure the
gitlab-development-kit/gitlabdirectory exists. - Go to the top
gitlab-development-kitdirectory and rungdk stopandgdk start.
If you get errors, run gdk doctor to troubleshoot.
For more advanced troubleshooting, continue to the Troubleshoot GDK section.
Troubleshoot GDK
NOTE: For more advanced troubleshooting, see the troubleshooting documentation and the #contribute channel on Discord.
If you encounter issues, go to the gitlab-development-kit/gitlab
directory and run gdk doctor.
If gdk doctor returns Node or Ruby-related errors, run:
yarn install && bundle install
bundle exec rails db:migrate RAILS_ENV=development
Error: No version is set for command
If you already use another version manager in your system, you may encounter the "No version is set for command " error.
To resolve this issue, you can temporarily comment out the sourcing of asdf.sh in your shell:
-
Open your shell configuration file (for example,
.zshrc,.bashrc):nano <path-to-shell-config> -
Comment out the following line:
# Added by GDK bootstrap # source ~/.asdf/asdf.sh -
After making these changes, restart your shell or terminal session for the modifications to take effect.
To use asdf again, revert any previous changes.
Change the code
After the GDK is ready, continue to Contribute code with the GDK.
